Mix View
Spacemap Go Help
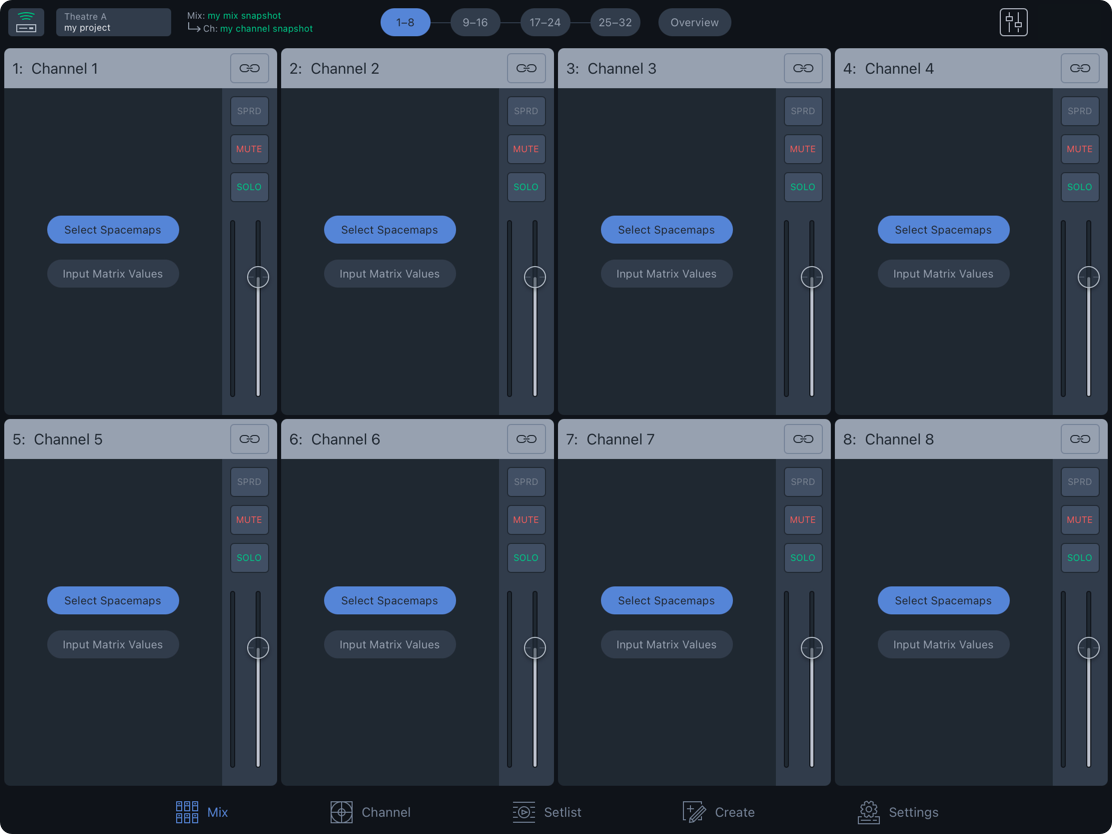
The Mix View presents common controls for 32 Spacemap Channels. For all controls of a channel, use Channel View.
Each Channel represents an input. There are three methods used to route an input signal to outputs:
- Real-time gesture control of the Spacemap Panner
- Automated control, using a Trajectory (predefined path) that the Spacemap Panner follows
- Enter summing matrix cross-point levels (Channel View)
By default, Spacemaps are not selected and Matrix levels are set to -inf dB (off) — no path for audio exists between a system input and an output. This default state is similar to a mixing console input that is not assigned to any buses, matrix outputs, or master outputs.
Select a Spacemap
The Mix View displays eight input channels per layer, up to four layers, 32 channels, as well as an Overview of all channels. The eight active channels are highlighted, Channels 1-8 below.
Tap the SELECT SPACEMAPS button to choose a Spacemap for a channel.
Spacemap Go – Mix View
Tap the ADD SPACEMAP button and select a Spacemap from the Choose Spacemap popover. Select APPLY TO ALL CHANNELS to assign the selected Spacemap(s) to all channels.

Spacemap Go – Select Spacemaps Window and Spacemap Library
Two Spacemaps can be selected for each channel. Tap the orange ![]() ADD SPACEMAP button to add a second Spacemap.
ADD SPACEMAP button to add a second Spacemap.
When two Spacemaps are added, use the percentage slider to change the percentage of the input signal sent to each Spacemap. The slider changes color depending on which Spacemap has the higher percentage, although both are routing audio unless the percentage is 0% for one of them. For example, using two Spacemaps, one Spacemap for lateral Speaker Nodes and another for overhead Speaker Nodes, fading between the two Spacemaps pans the input vertically. See details on the Spacemaps page.
view example 
Channel Matrix Values
The second option for routing an input to outputs is to enter cross-point Matrix levels. From the Mix View, tap the name of a channel or tap the Channel View button to open the Channel View. Use the arrows on either side of the channel name in the channel navigator to switch to the previous or next channel. Tap the channel name to open the channel selector pop-over and select another channel. Tap a matrix level to enter the output level for the channel. Swipe the Matrix row for additional outputs.

Spacemap Go – Channel Matrix Levels
Select a Trajectory
Trajectories are automated motion paths for the Spacemap Panner. When a Spacemap is assigned, the CHOOSE TRAJECTORY button is added below the Spacemap. Tap it to display the Trajectory Library. Tap a Trajectory to add it to the Spacemap.
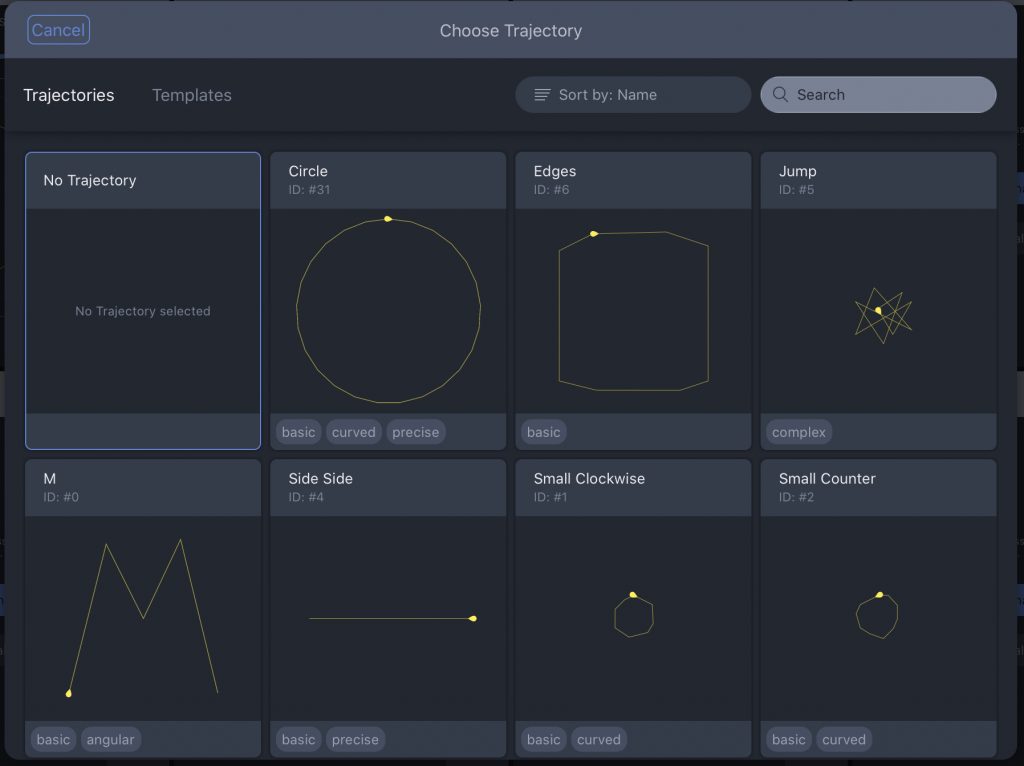
Spacemap Go – Trajectory Templates
From the Mix View, two controls are displayed below the Spacemap: one to play the Trajectory and another to reset the Trajectory. Tap the Trajectory Name next to these controls to open the Trajectory Library and select a different Trajectory or none.
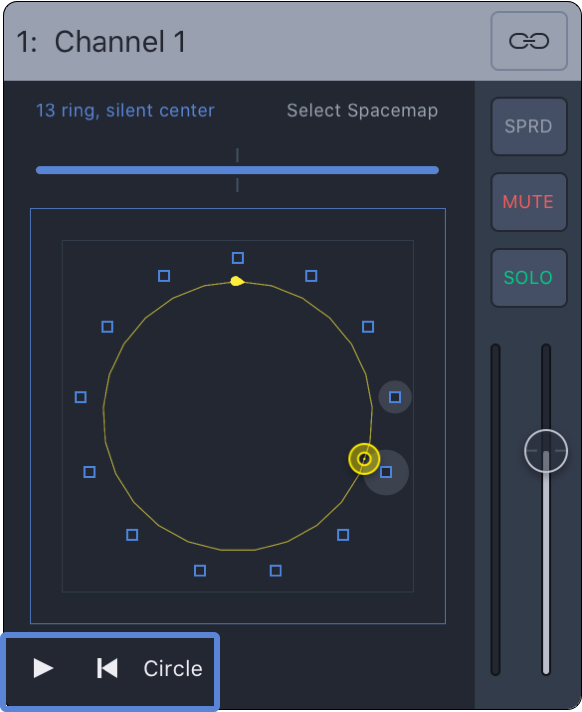
Mix View – Trajectory Controls
Remove Spacemap or Trajectory
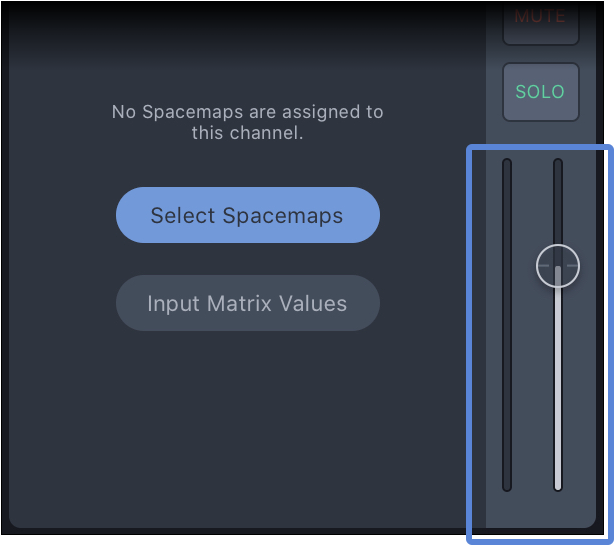
To remove a Spacemap or Trajectory from a channel, follow the same steps to add a Spacemap or Trajectory and select NO SPACEMAP or NO TRAJECTORY from the library.

Mix or Channel View – Select No Spacemap or No Trajectory
Channel Controls
Each channel has the following controls:
- Input Level Meter: Visual indication of the input level.
- Fader: Adjusts the audio level using a logarithmic slider. The nominal level (0 dB) is indicated by the grey line.
Mix View – Channel Signal Meter and Level Fader

Link: Tap this button to link the Fader Level, Solo, Mute, and Spread controls of odd/even channel pairs. Select a link mode for the Spacemap Panner – see options below. Select a Trajectory for the odd numbered channel of a linked pair. The Panner of the even numbered channel will follow the Trajectory of the odd channel depending on the link mode selected.
Spread: Regardless the Spacemap Panner position, the SPREAD function routes an input signal to all of the Speaker Nodes in a Spacemap. Tap the SPRD button to open the percentage slider. At 0%, no additional signal is sent to Speaker Nodes. As Spread is increased, the surrounding nodes without signal start receiving the input signal. When Spread is set to 100%, all the Speaker Nodes receive the input signal at 0 dB, no attenuation.
Mute: When MUTE is selected, audio is no longer routed to outputs from the channel.
Solo: When SOLO is selected, only audio from the selected Channel is routed to outputs, commonly referred to as Solo In Place.
Channel Link Options:
MONO: Both linked channels have the same behavior.
NEAR X: The even channel follows the odd channel, but is offset horizontally to the right.
NEAR Y: The even channel follows the odd one, but is offset vertically from the top.
FAR X: The even channel follows the odd channel, but is offset horizontally further to the right.
FAR Y: The even channel follows the odd one, but is offset vertically further from the top.
MIRROR X: When the X value is positive for the first linked channel, the X value is negative for the second, and vice versa.
MIRROR Y: When the Y values are positive for the first linked channel, the Y values are negative for the second, and vice versa.
MIRROR XY: Both X and Y values are mirrored as described above.
When linked, the even channel indicates the linked status.
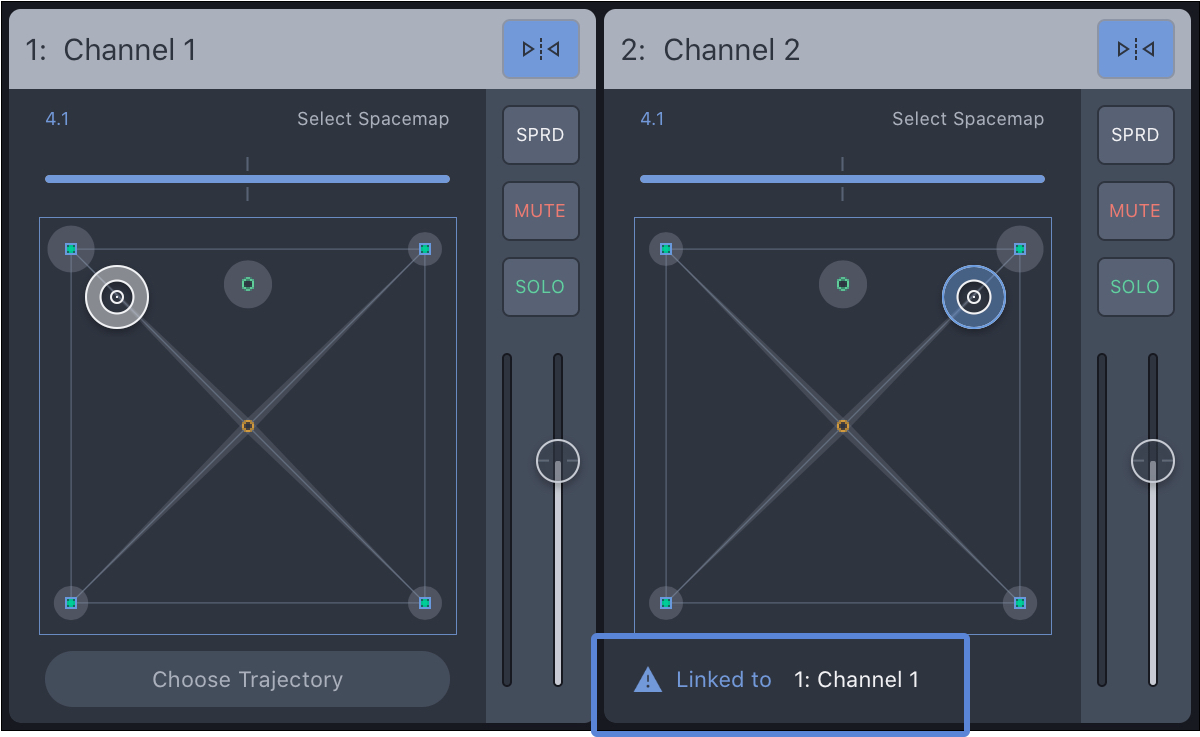
Mix View – Linked Channels
Channel Name
Tap-hold the channel label to change the name. A popover window opens; edit the name, and tap DONE.

Mix View – Rename Channel Pop-Over
What’s Next?
Please visit Channel View next.