DAW Spacemap Go Plugin
Spacemap Go Help
See the DAW plugin in action play video 
Plugin Installation
Download the Spacemap Go VST3 and AAX plugin, available here.
Microsoft Windows Installation
Unzip the file archive and launch the installer file Spacemap Go Plugin Setup.exe.
This file installs the VST3 and the AAX Spacemap Go plugin in the common files folder for plugins. If the DAW software is running, use the “re-scan for plugins” function of the DAW to update the available plugins.

Plugin Archive Contents, Windows OS – Launch Installer
macOS X Installation
Expand the archive file and launch the disk image file: Spacemap Go Plugin Setup.dmg
The Spacemap Go Plugin.pkg package installs the VST3, AU and AAX Spacemap Go plugin in the common files folder for plugins. If the DAW software is running, use the “re-scan for plugins” function of the DAW to update the available plugins.

Plugin Archive Contents, macOS X – Launch Installer
Using the Plugin with a DAW
The following example uses Reaper software. The steps are similar for most DAW software. For specific DAW information, see user entries in the Spacemap Go section of the Forum (link also in the navigation menu at the top of this page).
Setup the Spacemap System using Virtual GALAXY processors (launched in Compass) or GALAXY processors. Use the Spacemap Go app to configure the Spacemap System, see Hardware Connections and Configure Galaxy pages under the START menu above.
In the DAW, add an instance of the plugin to any channel.

DAW – Add the Spacemap Go Plugin to Any Channel
The plugin will load and a control window opens displaying the Spacemap System connection page. Select the Spacemap System to control with the plugin.
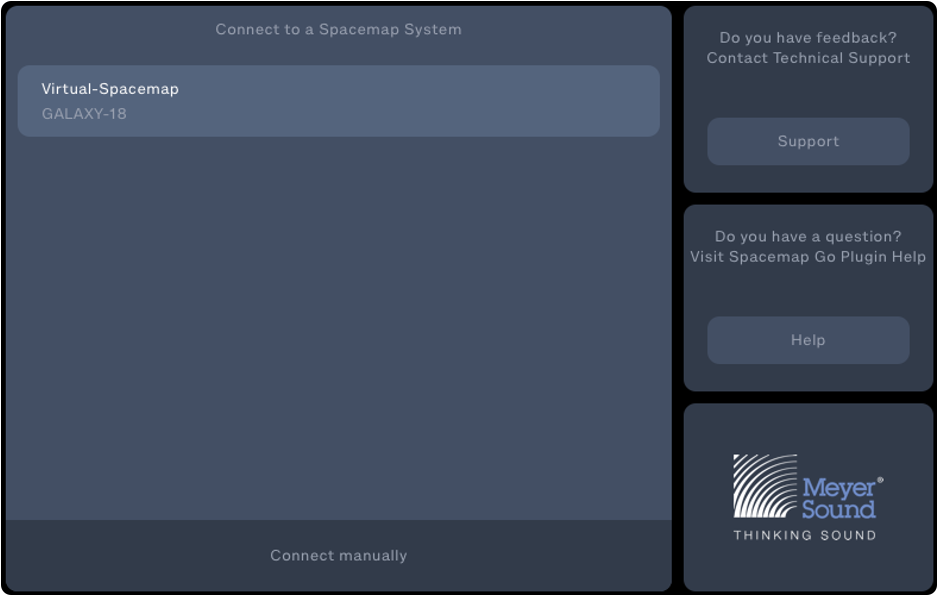
Spacemap Go Plugin – Select Spacemap System to Connect Plugin
Click CONNECT MANUALLY at the bottom of the window to enter the IPv4 address of a Spacemap System if an IPv4 address has been set for the system.

Spacemap Go Plugin – Set Manual IPv4 Address
In the plugin interface, use the Channel drop-down to select the Spacemap Channel this instance of the plugin will control.
NOTE: The assignment “None” controls global settings only (System, Mix, and Channel Snapshots, and Mix Level). Using different channels in the DAW can help separate Spacemap global controls and channel controls.

Spacemap Go Plugin – Select Spacemap Channel to Control with Plugin
Plugin Controls
The Spacemap Go Plugin interface allows for direct control of the following Spacemap Go Channel parameters:
X/Y Panner Location, Crossfade, Spread, Trajectory Start, Pause, Stop, and Rate
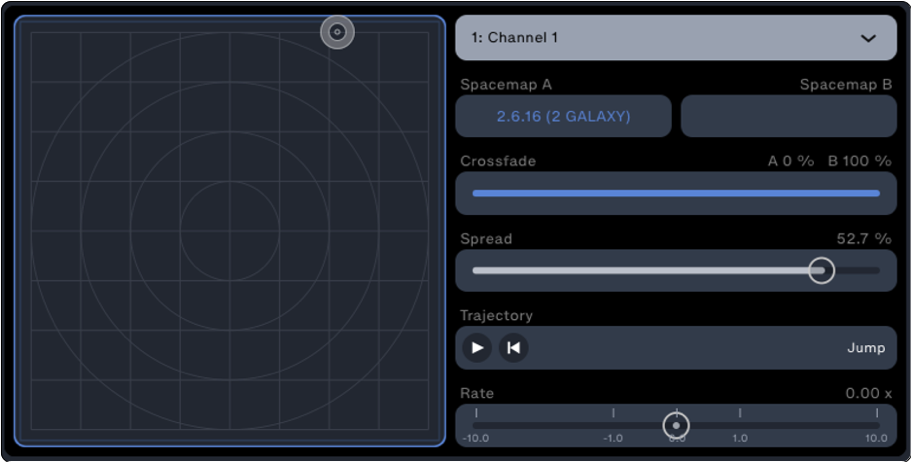
Spacemap Go Plugin – Available Channel Controls
The Channel Name, Spacemaps, and Trajectories are not modified using the plugin. These can be modified using the Spacemap Go app.
The global controls of the Spacemap System are located at the bottom of the plugin user interface. The left-hand button invokes the Spacemap Go Plugin Connection Page. The right-hand buttons enable recalling of the various Spacemap Snapshots and adjustment of the Mix Level. When the buttons are blue, the functions are enabled for the instance of the plugin.

Spacemap Go Plugin – Tap Spacemap System Name to Open Connection Panel (left), Recall Spacemap Go Snapshots
The Spacemap Go Plugin will send “Touch” commands to the DAW to write automation dynamically. The settings below will write the X and Y envelopes when the Spacemap Panner is moved in the Spacemap Go app, otherwise, the DAW will read the envelope values.
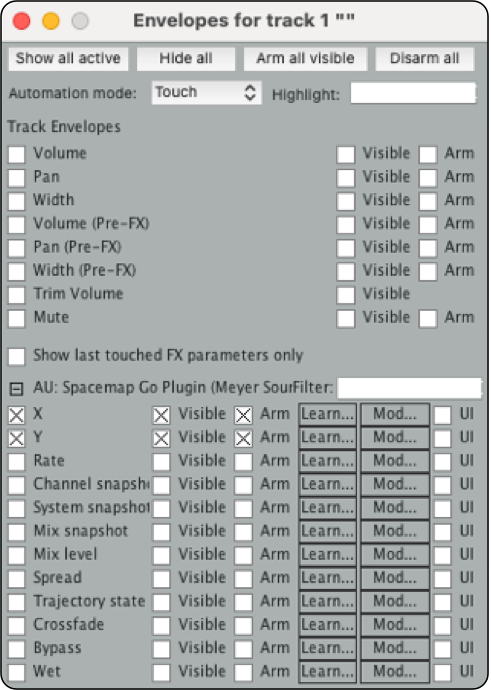
DAW – Available Automation Lane and Selections

DAW – Channel Envelope Points Recorded, Ready to be Played Back
Record Snapshot Recalls in DAW
There are several methods to recall a Spacemap Go Snapshot from a DAW. One method is to set markers, that when passed, trigger OSC commands to recall Spacemap System, Mix, or Channel Snapshots. Another method is to use channel envelopes to either record Spacemap Snapshot recalls using the Spacemap Go app or to write channel envelopes manually:
STEP 1: Use the Spacemap Go app to establish the Snapshot order.
STEP 2: Using the DAW, set the track to WRITE and select the Snapshot type (System, Mix, or Channel).

DAW – Channel “Write” Enabled for Mix Snapshot
STEP 3: Right-click on the automation envelope and set the envelope default point shape behavior to SQUARE.
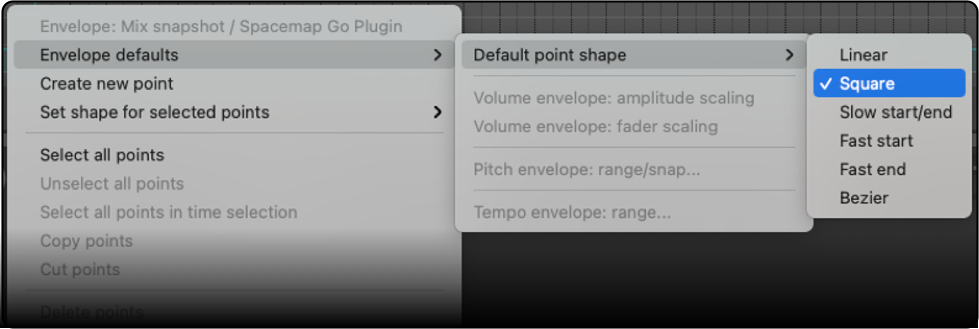
DAW – Set Point Shape to Square for Snapshot Recalls
NOTE: When using automation lanes to recall Spacemap Snapshots, avoid ramps between Snapshot recall ID values. The DAW will extrapolate all the values between the points, recalling many Snapshots instead of only the intended Snapshot.
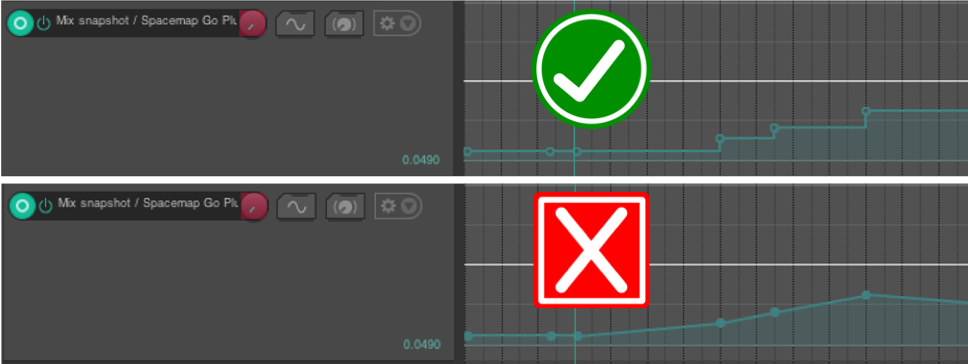
DAW – Square (above) and Linear (below) Mix Snapshot Recall Envelopes
STEP 4: In the DAW, play the track. Using the Spacemap Go app, recall Snapshots when desired. The envelope will update with the values.
STEP 5: In the DAW, set track to READ. In the Plugin, enable Snapshot recall. The envelope points can be edited for time and/or Snapshot Recall ID values.
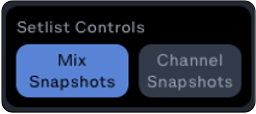
Spacemap Plugin – Mix Snapshot Recall Enabled
Create Snapshot Recalls Using DAW
The recalling of Snapshots can also be written into automation lanes using the DAW. This allows for “offline” Snapshot recall programming and editing.
STEP 1: Make sure the intended automation lane (Mix, Channel or System Snapshot) is displayed for the track containing the plugin. The automation mode is not relevant at this point, but it will need to be changed to READ when playing back.
STEP 2: Create automation points using one of the methods below. Options, behaviors and shortcuts vary between DAW’s, but the basic steps are universal.
Option 1: Manually draw envelope breakpoints at (or close to) the desired points in the timeline. This is achieved in any DAW by either clicking, double-clicking or clicking with a modifier key in the automation lane field.

DAW – Manually Draw Snapshot Recall Envelope
Option 2: Create envelope breakpoints at the edge of the selection. This is usually achieved by either making a selection in the automation lane and then dragging the horizontal automation envelope up or down, or by clicking and dragging while holding specific modifier keys (e.g., OPT + SHIFT + CLICK and DRAG in Reaper/macOS). This method has the advantage of creating square edges at each end of the selection by default, avoiding the ramping issues mentioned above.
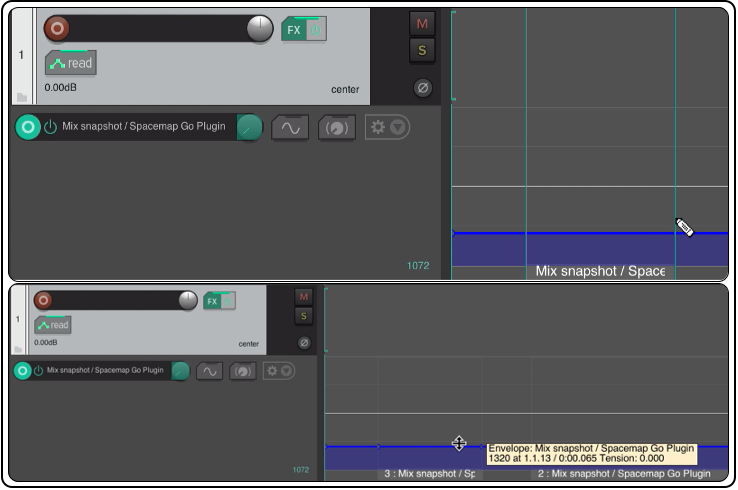
DAW – Create Envelope Breakpoints at Edge of Selection
STEP 3: Adjust the time and value of the envelope breakpoints, by either clicking and dragging on the points, by clicking and dragging entire (horizontal) sections of the automation line or by entering them in the Envelope Point (or similarly named) menu in your DAW. Please note that clicking and dragging might require modifier key(s) be pressed in order to do fine adjustments to the values. Make sure the automation line is actually “square” (e.g., that successive breakpoints happen at the same moment in time and there is no ramping).
NOTE: The parameter value will always display the correct Snapshot ID when using the VST3 and AAX plugins. The AU version may have variable behaviors depending on the DAW used.
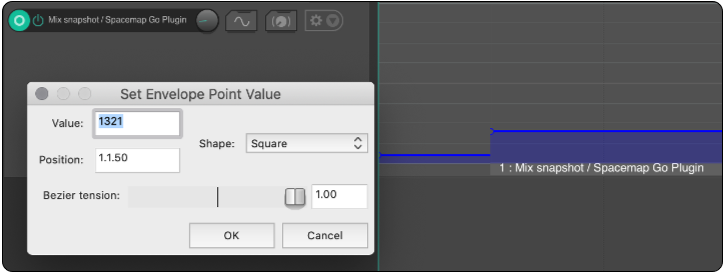
DAW – Edit the Time and Value of Breakpoints
Recommended Workflow
- Assign instances of the plugin to tracks for control of associated Spacemap Channels. For these instances, disable the Setlist and System Controls (lower-right of plugin). These controls are disabled by default. The buttons are grey when controls are disabled, blue when enabled.
- Assign one instance of the plugin to an otherwise unused track, a bus track, or the master track, expressly for the purpose of making manual or automated changes to the Global Spacemap controls (Mix Level and Snapshot recalls). Enable the Setlist Controls and/or System Controls in the plugin. This strategy minimizes the likelihood of multiple instances of the plugin making changes to Global Spacemap Controls.
NOTE: The plugin can be assigned to a track, using NONE as the selected Spacemap Channel, allowing only Mix Level and Spacemap Snapshot recall controls.
- In the Spacemap Go app, after Spacemap Snapshots are created and the Setlist is established, recall the first Snapshot.
- In the DAW, use one of the above methods to create automation envelopes to recall Spacemap Snapshots.
NOTE: In some DAW, all of a track’s envelopes are captured when the track is in Write, Touch or Latch mode. Ensure that only the intended automation data is read during playback. For example, using envelopes to control the Panner X/Y position could conflict with a change in trajectory status because both will try to update the Panner position at the same time. The same conflict could exist when a Snapshot is recalled to start or stop a trajectory and an X/Y Panner move is in progress. We recommend avoiding instances where automation lanes make simultaneous changes that send the Spacemap system conflicting commands.